
Discover Smart Appliances with LG ThinQ
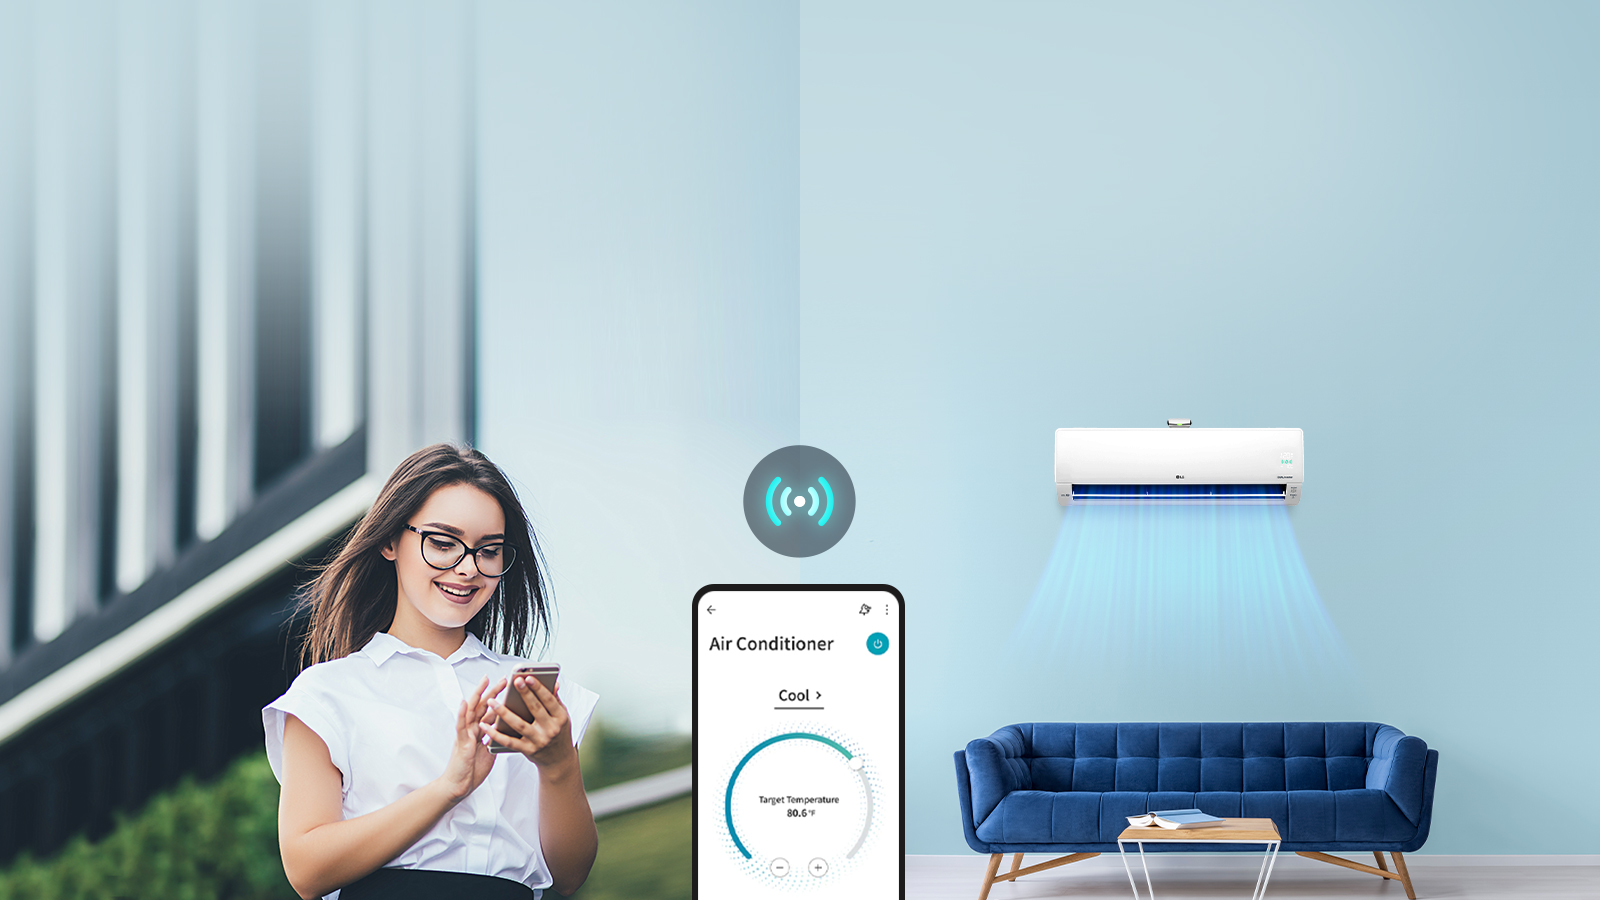
ThinQ technology enables smart home connectivity over Wi-Fi
Recommended features from your home assistant
-
Connect and Control from anywhere
The LG ThinQ app allows you to easily connect with your appliance in a way you never could before. Even when you are outside, you can operate the appliance remotely
.jpg)
.jpg)
-
Simple Control with Voice Assistant
Tell your appliance exactly what you need by just saying it out, and the AI speaker will listen and check the cycle to let you know
.jpg)
.jpg)
-
Efficient Product Maintenance
Through the LG ThinQ app, check on your appliance, download new cycles, monitor energy usage, and much more.
.jpg)
.jpg)


Get going with ThinQ
Manage all your devices from one place whether from home, on the go, or lounging by the beach. Press the plus button to see how you can install the app.
-
How to install the LG ThinQ app
Step 1. ThinQ app download
Search for the LG ThinQ application from the Google Play or Apple App Store on a smart phone.
Step 2. Log-in
Log in with your LG account if you have one.
Step 3. Add a device
You made it to LG ThinQ app’s main page! Now time to connect your LG device(s).
Step 4. Select a device
Select which device you want to connect to.
Step 5. Go ahead!
Access your device(s) using the ThinQ app.![The process of installing the LG ThinQ app is explained in order on the six cell phone screens]()
-
Optional AI Speaker Connection - Connect Google Home
1. Open Google Home app and press ‘Add’.
2. Touch + to add your appliances.
3. Search LG ThinQ & Log in with ThinQ account.![Connect Google Home]()
-
Optional AI Speaker Connection - Connect Amazon Alexa
1. Open Amazon Alexa app and go to menu.
2. Press “Skills & Games”.
3. Search LG ThinQ & Log in with ThinQ account.![Connect Amazon Alexa]()
One-Stop Easy Registration

How to register your device with the QR code
Step 1. Click or tap “+ Add a device”
Step 2. Select “Scan QR” from the options
Step 3. Scan the QR code on your device
Step 4. The device is now registered
*Models without QR can be registered manually by entering the serial number
Step 2. Select “Scan QR” from the options
Step 3. Scan the QR code on your device
Step 4. The device is now registered
*Models without QR can be registered manually by entering the serial number
*QR quick scan can be used on Wi-Fi enabled products produced from Jan 2022 onwards.
LG ThinQ QR Code Location

Refrigerator

Wine Cellar

WashTower™

Washer/Dryer

Mini Wash1

Mini Wash2

Top Loader

Styler

Vaccum Cleaner

Robotic Cleaner

Air Conditioner1

Air Conditioner2

Portable Air Conditioner

Air Purifier1

Air Purifier2

Air Purifier3

Air Purifier4

Air Purifier5

Dehumidifier

Range/ Oven

Cooktop

Microwave Oven

Dish Washer

Water Purifier
FAQ
Press the plus button for answers to popular questions.
-
Q. How do I add a product on the LG ThinQ app?
Add products to the ThinQ app using the Add feature.
1. On the home screen, tap "+ Add a device" > "Select Device"
Press the Add a device button on the Home screen and touch Select Device.
2. Select the product from the product list.
Then, proceed by following the instructions. Select the product icon.![Q. How do I add a product on the LG ThinQ app?1]()
-
*The screen shown on the instructions may differ from that displayed on the actual app. The availability of products and services may vary depending on the models you own, the region/country you reside in, or the app and product versions.
![ThinQ-MicroPage-2020-09-8-1-Google]()
-
Q. While trying to add an air conditioner, a message says the “LG_AC_~~~” network password is incorrect
For the network name "LG_AC_XXXX", enter the last four characters “XXXX” of the network name two times without a space in the password field.
Passwords are case sensitive, so please try again entering upper and lowercase letters exactly.
Screen for entering the Wi-Fi password.![Q. While trying to add an air conditioner, a message says the “LG_AC_~~~” network password is incorrect3]()
-
*Note that for iPhones, a feature that automatically capitalizes the first letter of an input or the first word after a period may be ON.
*The screen shown on the instructions may differ from that displayed on the actual app. The availability of products and services may vary depending on the models you own, the region/country you reside in, or the app and product versions.![ThinQ-MicroPage-2020-09-8-1-Google]()
-
Q. While trying to add a product, I am getting a router image with a message that says "No Network Connection"
- Before adding a product to ThinQ, make sure your smartphone is properly connected to the internet.
If you continue to have problems connecting to the internet, check the connection of your router.
- This message may occur if the router is too far away. If you can't move or come in closer proximity to the router, please install the Wi-Fi amplifier and try again.
- Try again after unplugging or resetting the router.![Q. While trying to add a product, I am getting a router image with a message that says "No Network Connection"5]()
-
*If you are unable to proceed to the next step of adding your product, close the app and run it again.
*The screen shown on the instructions may differ from that displayed on the actual app. The availability of products and services may vary depending on the models you own, the region/country you reside in, or the app and product versions.![ThinQ-MicroPage-2020-09-8-1-Google]()
-
Q. Is it possible to use the 5GHz Wi-Fi frequency band when using appliances with the ThinQ app?
LG Electronics appliances and the ThinQ app support the 2.4GHz Wi-Fi frequency band only.![Q. Is it possible to use the 5GHz Wi-Fi frequency band when using appliances with the ThinQ app?7]()
-
*The screen shown on the instructions may differ from that displayed on the actual app. The availability of products and services may vary depending on the models you own, the region/country you reside in, or the app and product versions.
![ThinQ-MicroPage-2020-09-8-1-Google]()
-
Q. What are the recommended smartphone specifications to run the ThinQ app?
Android OS Requirements
The ThinQ app supports Android OS 7.0 and higher. Smartphones using Android OS version 6.0.1 or lower must update their OS in order to use the latest version of the app.
iOS Requirements
The ThinQ app supports iOS 12.0 and higher. Smartphones using iOS 10.3 or lower must update their OS in order to use the latest version of the app.
*Please refer to the Playstore and App Store links for the most accurate, up-to-date information.
Playstore: https://play.google.com/store/apps/details?id=com.lgeha.nuts
Appstore: https://apps.apple.com/app/lg-thinq/id993504342![Q. What are the recommended smartphone specifications to run the ThinQ app?9]()
-
*There may be some limitations in using the app based on other smartphone specifications in addition to the OS version.
• RAM: 2GB
• Resolution: 1280 x 800 (WXGA)
• Available Storage Space: 377.2MB
*The screen shown on the instructions may differ from that displayed on the actual app. The availability of products and services may vary depending on the models you own, the region/country you reside in, or the app and product versions.![ThinQ-MicroPage-2020-09-8-1-Google]()
-
Q. How do I use the Smart Diagnosis feature?
Smart Diagnosis is a feature that diagnoses the possible causes of product failures. Proceed with the steps below if you own products with the Smart Diagnosis logo.
1. On the home screen, go to the top left Menu > Smart Diagnosis
Press the top left menu icon on the Home screen and select Smart Diagnosis.
2. After selecting a product, proceed with Smart Diagnosis by following the guide.
Smart Diagnosis screen being displayed after selecting the product.![Q. How do I use the Smart Diagnosis feature?11]()
-
*If the Wi-Fi Smart Diagnosis is not supported, try running the Audible Smart Diagnosis by following the instructions shown on the app screen. Please be advised that a diagnosis tone is produced while the audible smart diagnosis is in progress.
*The screen shown on the instructions may differ from that displayed on the actual app. The availability of products and services may vary depending on the models you own, the region/country you reside in, or the app and product versions.![ThinQ-MicroPage-2020-09-8-1-Google]()
-
Q. What should I do if I replaced my router?
If you have replaced the router in a space where your products are located in, you also need to replace
the product network registered on your app. If you don't, you might not be able to use the products.
1. On the top left menu on the app's Home screen, > select "Device Settings."
Touch the top left menu icon on the home screen and select Device Settings.
2. From the list, choose a product whose network you want to change.
Select a product card from the list, and tap "Change Network."
3. Reset the Wi-Fi network by following the instructions on the screen.![Q. What should I do if I replaced my router?13]()
-
*The screen shown on the instructions may differ from that displayed on the acutal app. The availability of products and services may vary depending on the models you own, the region/country you reside in, or the app and product versions.
![ThinQ-MicroPage-2020-09-8-1-Google]()
-
Q. For iPhone users, having trouble adding products on your ThinQ app?
If you can't add products on your iPhone running iOS 14, ThinQ may not have the proper access permissions. ThinQ requires access to the following settings:
1. Toggle “Local Network” to ON
To add products to ThinQ, your phone needs to be connected to your local network. Make sure the Wi-Fi network is connected and ThinQ has been given access permission.
Zooming in on the Local Network menu in iPhone Settings
2. Allow “Location” access
Zooming in on the Location menu in iPhone Settings
1) Tap “Location”
2) Select “While Using the App” or “Always.”
3) Turn on "Precise Location"
The "Precise Location" option helps the app to find products more accurately.
Using the location service, you can remotely control products and use automation features, and find customer service centers based on the current location information.
Once you've configured all of these settings, try adding your product again.![Q. For iPhone users, having trouble adding products on your ThinQ app?15]()
-
*The screen shown on the instructions may differ from that displayed on the actual app. The availability of products and services may vary depending on the models you own, the region/country you reside in, or the app and product versions.
*Please check Apple's policies for the latest information. https://support.apple.com/en-mk/HT211870![ThinQ-MicroPage-2020-09-8-1-Google]()
-
Q. How do I change the app’s default language within the same region?
Changing the default language of the ThinQ app within the same regional setting may be possible for only select regions (countries). You can change the language settings by following the order below.
1. On the home screen, go to the top left Menu, and touch the top right Settings icon
Press the top left menu icon on the Home screen and select the top right App Settings.
2. Tap "Language" to check and change the language Select the language.![Q. How do I change the app’s default language within the same region?17]()
-
*The screen shown on the instructions may differ from that displayed on the actual app. The availability of products and services may vary depending on the models you own, the region/country you reside in, or the app and product versions.
![ThinQ-MicroPage-2020-09-8-1-Google]()
LG ThinQ products for you
LG ThinQ-compatible appliances are designed to fit your exact needs and enhance your day-to-day living.
Browse below for LG ThinQ products that’ll upgrade your life.
Browse below for LG ThinQ products that’ll upgrade your life.


