At a Glance
The SP7R includes Meridian's Horizon up-mixing technology with multi-dimensional sound quality across the sound bar and speaker kit in a 7.1 channel. To complete setup the sound bar should first be connected to the TV. Follow the steps below complete setup and to connect the wireless subwoofer and the wireless receiver for the rear speakers.
The rear speakers need to hard wired to a rear transmitter to enable the wireless connection to the sound bar.
Try This
1Plug the power cable into the wireless subwoofer.
2Plug the power cable connected to the wireless subwoofer into an outlet.
3The wireless subwoofer will automatically be connected to the sound bar. A solid ● GREEN light indicates that the subwoofer connected successfully.
1Connect the speaker cables on the wireless receiver (2) to the corresponding terminals on the rear left and right speakers (1).
2Connect the ● BLACK striped cable to the (-) negative terminal and the ● RED striped cable to the (+) positive terminal.
3Plug the wireless receiver power cable into an outlet.
4Press the POWER button on the sound bar to turn it on.
5When the connection is automatically established, you will see the LED on the front of the wireless receiver light up in green.
- Please only use the speakers provided with the product. Using other speakers may cause malfunction.
- Connect the speaker cables to the corresponding terminals. Connect to the positive cable to the positive terminal and the negative cable to the negative terminal. An incorrectly connected cable will distort the sound or produce no bass.
If the wireless subwoofer or rear speakers fail to pair with the sound bar, please see our LG Sound Bar - Why Isn't My Subwoofer Connect to My LG Sound Bar article.
1Press the Settings button. The product enters the setting mode and you can see “OFF-AUTO POWER” or “ON-AUTO POWER”.
2While the “OFF-AUTO POWER” or “ON-AUTO POWER” is scrolling in the status display, press Left/Right button to select the surround sound setting. You can see the status of the surround sound, “OFF-SURROUND” or “ON-SURROUND”.
3While the “OFF-SURROUND” or “ON-SURROUND” is scrolling in the status display, press Up/Down button to turn on or off the surround sound.
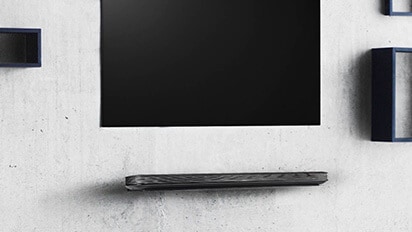
1Using the HDMI cable, connect the HDMI OUT (TV eARC/ARC) terminal on the back of the product to the HDMI IN (ARC) terminal on the TV as shown in the picture.
2Press the Function button repeatedly until “OPT/HDMI ARC” appears on the status display.
3Press the SETTINGS button on the TV remote control to enter the [Speaker] menu and set the output speaker to [HDMI ARC].
Settings and menu items may vary depending on the TV manufacturer.
4When the TV is properly connected to the product, “ARC” or “E-ARC” will appear on the status display.
Ensure that your TV supports the eARC function before you turn on eARC from the Settings menu. For more information on how to use this function, please refer to your TV's user manual. Settings may vary depending on the TV.
1If the digital cable terminal has a cover, first remove the covers from both ends.
2Using an optical cable, connect the OPTICAL IN terminal on the back of the product to the Optical Digital Output (OPTICAL OUT) terminal on the TV as shown in the picture.
3Press the Function button repeatedly until “OPT/HDMI ARC” appears on the status display.
4Press the Settings button on the TV remote control to enter the [Speaker] menu and set the output speaker to [Optical] or [External Speaker].
Settings and menu items may vary depending on the TV manufacturer.
If the optical input signal and the ARC signal attempt to connect at the same time, the ARC signal will take priority.
1Press the Bluetooth pair button. After a moment, “BT READY” appears on the status display.
2Press the Settings button on the TV remote control and enter the [Speaker] menu to set the output speaker to [Bluetooth].
3Find and tap “LG_Speaker_SP11RA_XXXX”.
4When the product is connected to the TV via Bluetooth, you can see the status display change from “PAIRED” → “Connected TV name” → “BT”.